If you’re collecting event registrations, payments, or course sign-ups in WordPress, it makes sense to give people something they can download right away. That might be a ticket, a receipt, or a certificate they can save or print right away after submitting your form.
The problem is that WordPress forms don’t generate PDFs by default. Many site owners end up exporting entries, pasting data into documents, and fixing layouts by hand.
That extra work adds up fast, increases the risk of mistakes, and becomes frustrating once submissions start coming in regularly.
In this guide, I’ll show you my tested method for automatically turning WordPress form entries into PDFs using WPForms. I’ll walk you through the setup step by step, so each person receives a clean, professional PDF immediately after submitting your form. 📄

TL;DR: To turn WordPress form entries into PDFs, install WPForms Pro and its PDF Addon, then connect a PDF template to your form so a new PDF is created automatically after each submission. You can also attach that PDF to your form notifications, so you (and the person who filled out the form) get a copy right away.
Why Automatically Generate PDFs From Form Entries? (Benefits + Use Cases)
Manually converting form entries to PDFs takes longer than it should. You have to export the entry, put it into a document, check that everything looks right, save it as a PDF, and then send it out. Doing this again and again slows you down, and it’s easy to make small mistakes along the way.
Automatically generating PDFs fixes that. Each form submission can instantly become a ready-to-send PDF without you needing to touch anything.
That means less busywork, fewer errors, and documents that always look clean and consistent. It also makes it easier to keep records, since everything is already saved in a clear format.
Here are a few common ways you can use automatic PDF generation from form entries:
| Website type | Example PDFs |
|---|---|
| Consulting/services | Quotes, proposals |
| Event websites | Tickets, registration confirmations |
| Online stores | Invoices, receipts |
| Online courses | Certificates, enrollments |
| Legal, HR, and admin | Consent forms, waivers, authorization letters |
| Real estate | Property details, book-a-viewing confirmations |
Overall, automatically generating PDFs helps you spend less time on admin work and more time running your website or business. All while giving visitors a faster and smoother experience.
With that in mind, here’s everything I’ll share in this guide:
- Step 1: Install and Activate WPForms Pro
- Step 2: Create Your Form or Select an Existing One
- Step 3: Set Up Form Notifications and Confirmations (Optional)
- Step 4: Configure the PDF Settings
- Step 5: Customize and Style Your PDF
- Step 6: Adjust Advanced PDF Settings
- Step 7: Test Your PDF Generation
- Step 8: Embed Your Form in WordPress
- FAQs About PDFs and Forms in WordPress
- Additional Resources for Using Forms in WordPress
Step 1: Install and Activate WPForms Pro
The first thing you need to do is install WPForms Pro on your WordPress site. I’ve been using WPForms for years, and it’s hands down the best WordPress form plugin I’ve tried out.
It comes with a powerful PDF addon that automatically generates PDFs from your form submissions. Plus, WPForms lets you create all kinds of forms, including contact, payment, survey, and newsletter registration forms.
We use WPForms at WPBeginner for our contact form, site migration request form, and our annual readers’ survey. See our detailed WPForms review for more insights into the plugin.
To get started, head over to the WPForms website, click the ‘Get WPForms Now’ button, and complete the registration process.

💡 Note: The PDF generation feature only works with WPForms Pro or higher plans. The WPForms Lite version doesn’t include this functionality, so you’ll need to upgrade if you’re currently using the free version.
Once you complete your purchase, you’ll have your own WPForms account dashboard, where you can download your plugin zip file and license key. You’ll need these in a moment, so you might want to keep this tab open or save them somewhere safe – like a password manager.
Now, it’s time to install the WPForms plugin on your WordPress site.
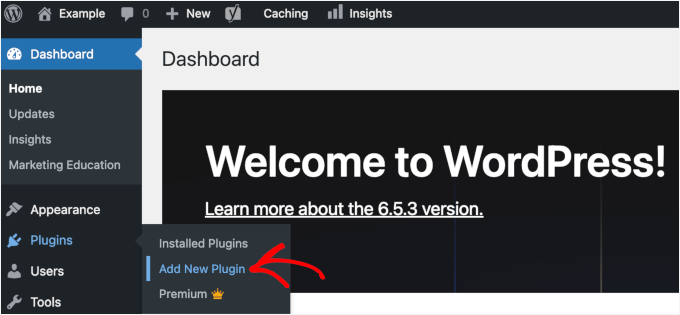
From your WordPress admin dashboard, go to Plugins » Add New Plugin.
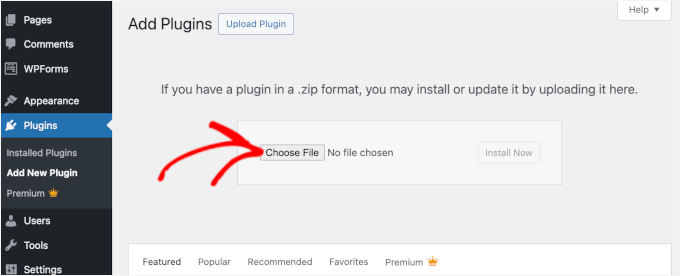
Click the ‘Upload Plugin’ button at the top of the page.
Choose the WPForms plugin file you just downloaded (a .zip file) and install it.
After installation finishes, click the ‘Activate Plugin’ button. WPForms will now appear in your admin dashboard.
You can then go to WPForms » Settings to activate your license key. Go ahead and paste the key into the box and click ‘Verify Key.’
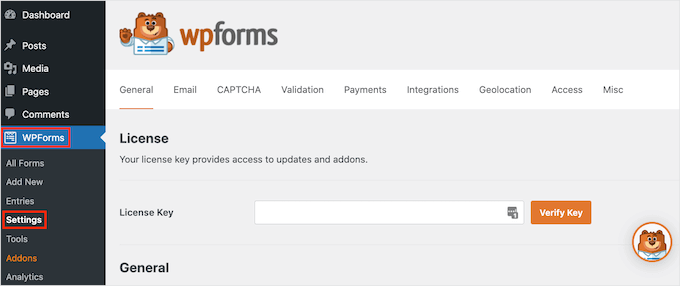
This activation step is important because it unlocks all the Pro features, including the PDF Addon we’ll be using. Once your key is verified, you’re ready to start creating WordPress forms that generate PDFs automatically.
If you need help, check out our guide on how to install a WordPress plugin.
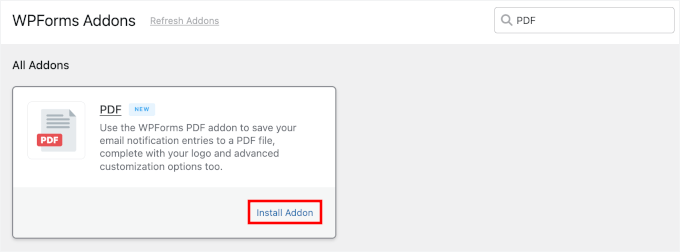
After that, you can navigate to WPForms » Addons to install the PDF Addon.
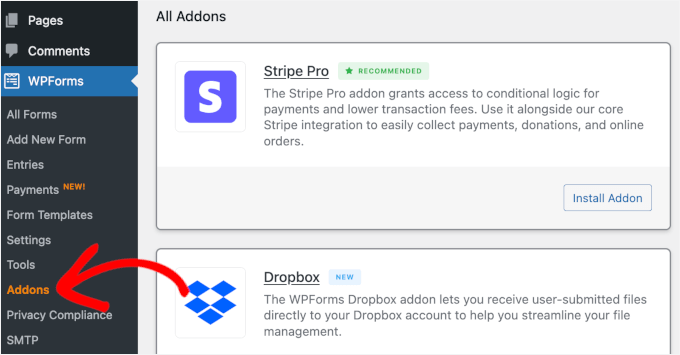
Inside the Addons panel, you can use the search bar to quickly find the PDF Addon.
In the search result, simply click the ‘Install Addon’ button to enable it.
Step 2: Create Your Form or Select an Existing One
Now that WPForms and PDF Addon are installed and activated, it’s time to create the form you’ll use for PDF generation.
In this tutorial, I’m going to create a simple terms of service form and set up an automated PDF for demonstration.
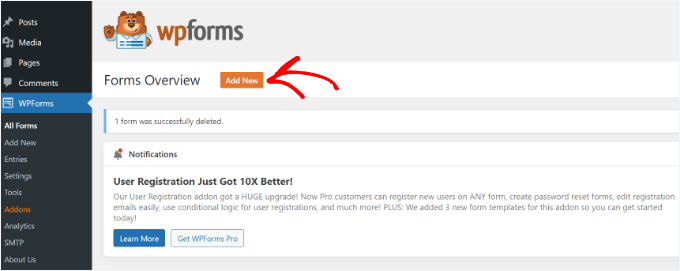
From your WordPress dashboard, go to WPForms » Add New.
💡 Note: You can either build a new form from scratch or use one of your existing forms. If you want to edit a form, you can go to the ‘All Forms’ tab in WPFForms and click the ‘Edit’ button for the form you want to add automated PDF generation.
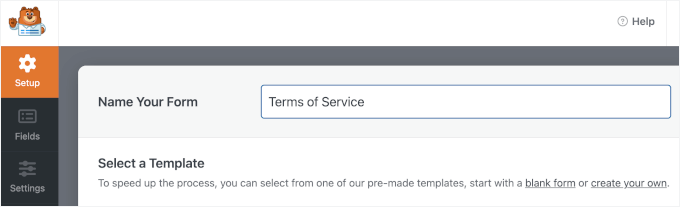
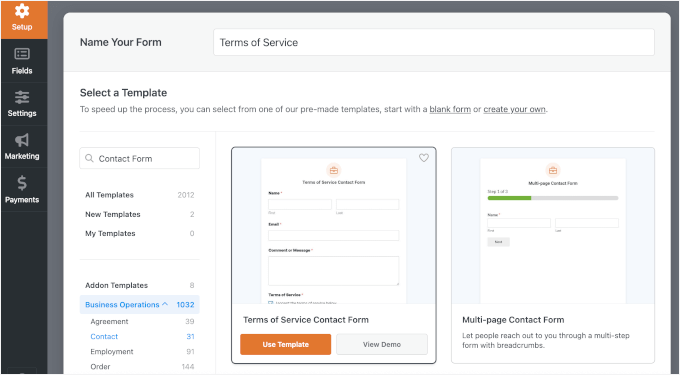
This opens the Setup page, where you can name your form.
This is for your reference only, but I recommend using a clear name for easier organization.
Next, choose how to build your form.
You can start from scratch, use the AI form builder, or pick a template.
For demonstration, I’ll show you how to do it using a pre-made form template.
In the search bar, you can type in keywords, such as “Contact Form,” “Receipt,” “Agreement,” or anything that fits your needs, to quickly find the perfect template.
When you find the form template you like, hover over it and click the ‘Use Template’ button. For demonstration, I’m going to choose the Terms of Service Form template.
WPForms will then open the form builder interface.
The Terms of Service form template comes preloaded with fields such as date, receipt number, order details, payer name, and payment information.
You can take a moment to look at the form builder interface. On the left side, you’ll see all the available form fields you can add. The right panel shows the actual fields in your form.
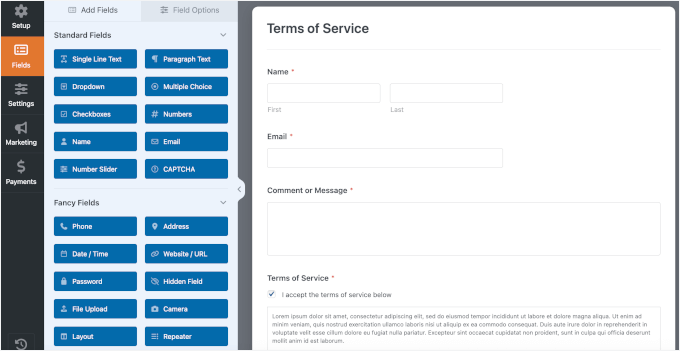
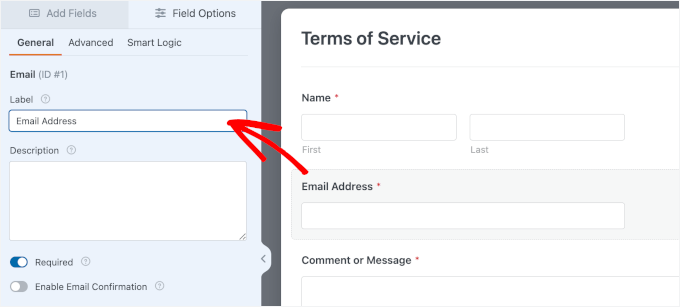
To customize this form, click on any field in the right panel to edit it.
For example, if you want to change the Email label to Email Address, just click that field and type the new label in the settings panel on the right. You can also make fields required or optional, add a short description, and change their order by dragging them up or down.
If you need to add more fields, like a dropdown for additional options or a file upload field for supporting documents, simply drag them from the left panel into your form.
Since we want this to be a signed legal document, make sure to drag the Signature field into your form as well.
From here, you can continue tweaking this form template to fit your needs.
One thing that you want to do for sure is to edit the sample text for your Terms of Service checkbox. Simply click on the field and rewrite the text in ‘Description.’

Once your form looks exactly how you want it, you’re ready to configure your form settings.
Step 3: Set Up Form Notifications and Confirmations (Optional)
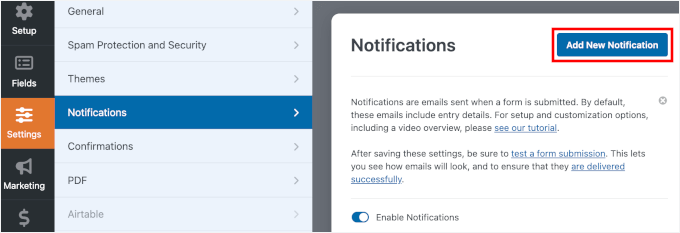
Before we set up the automated PDF generation, it’s a good idea to quickly check the Notifications and Confirmations settings. Do note that this step is optional, but it ensures that both you and your users receive the right follow-up after form submission.
By default, form notifications are sent to the site admin. If you also want to send a copy of the PDF to the user, you can add another notification for that.
To do this, open Settings » Notifications, and click ‘Add New Notification.’
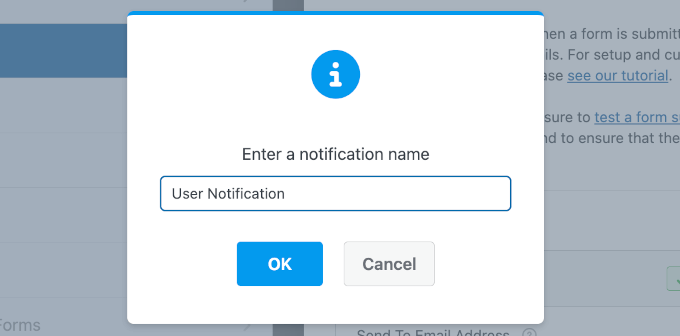
In the popup, give your notification a name.
For example, “Send PDF to User” or “User Notification,” and click ‘OK.’
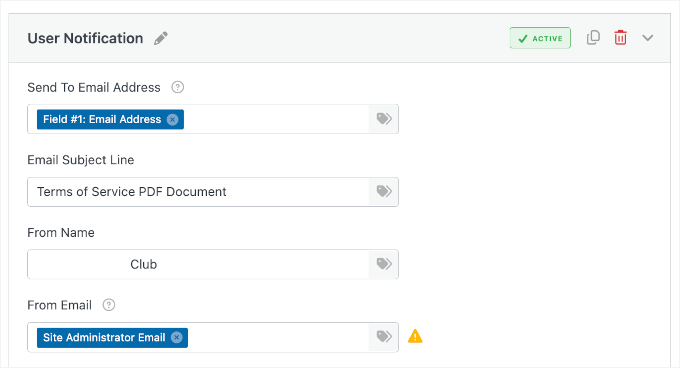
In the Send To Email Address field, you’ll want to use a Smart Tag so the email is sent to the person who submitted the form. Click the Smart Tag icon at the end of the field and select the Email field from your form.
If your form needs to notify multiple people, you can go ahead and add multiple email addresses, separated by commas.
Next, you can fill in the Email Subject, From Name, and From Email fields. You can use Smart Tags here, too, if you want to automatically personalize the message or include form details.
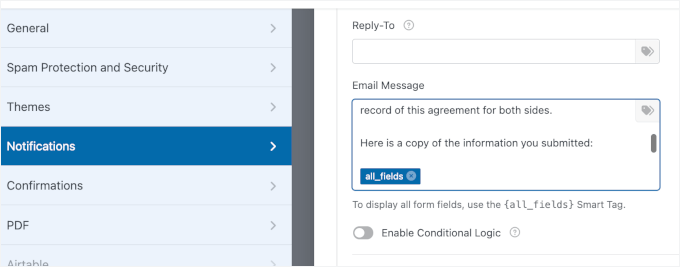
After that, you can scroll down to the ‘Email Message’ field.
By default, WPForms has included the {all_fields} smart tag, but you can add more content to make sure your notification email looks good.
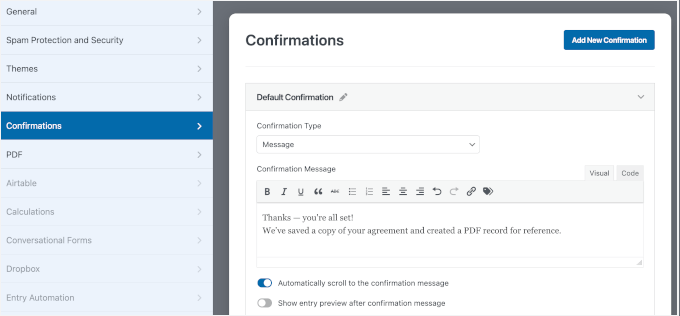
While you’re here, click over to the Settings » Confirmations tab as well.
WPForms offers three types of confirmations: a message, a redirect, or sending users to a specific URL.
In this tutorial, I’m using the ‘Message’ confirmation because I want to keep users on the same page after they submit the form. Once that’s set, you’re done with this step.
Other than a confirmation message, you can redirect users to another web page or a completely different site.
For more information, you can see our guide on how to redirect users after form submission.
Step 4: Configure the PDF Settings
With your form built, it’s time to set up the PDF generation. In this step, you’ll configure WPForms to automatically create a professional PDF every time someone submits your form.
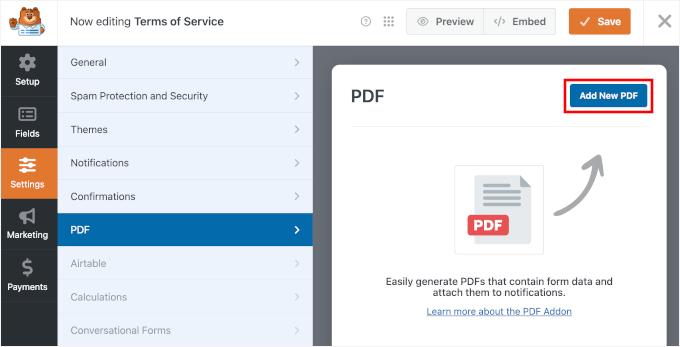
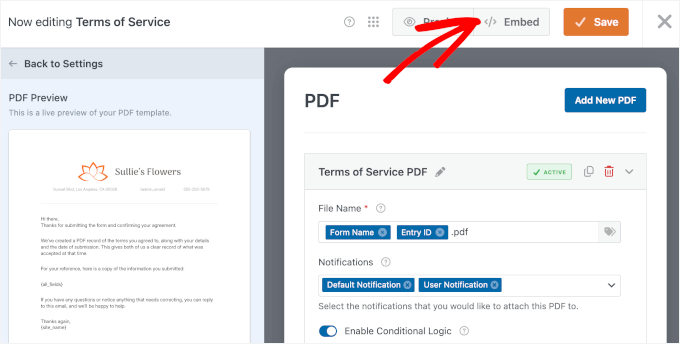
To start, look at the left sidebar under ‘Settings’ in the form builder and switch to the ‘PDF’ tab. Then, click the ‘Add New PDF’ button.
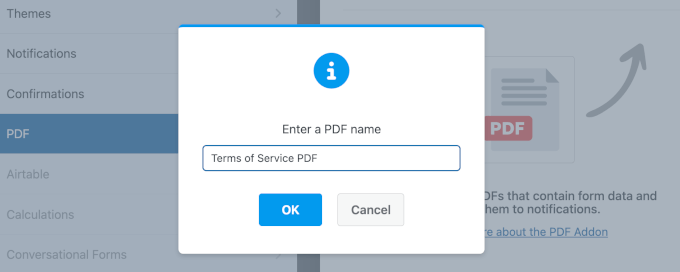
A popup window will appear asking you to name your PDF.
Go ahead and add a descriptive name that makes sense for your records. You can always change this later if needed, so don’t stress too much about getting it perfect right now.
Click ‘OK’ to continue.
With your PDF configuration enabled, WPForms will show you several important settings.
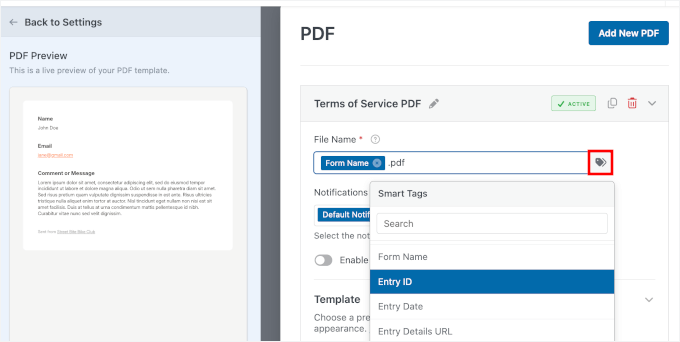
The first thing you’ll see is the ‘File Name’ field. By default, WPForms uses the “Entry for {form-name}” format as the PDF filename, but you can customize this.
I personally like to include smart tags here to make each PDF unique. For example, you could use something like {form_name}-{entry_id}, which would create files named “Terms-of-Service-123.pdf.”
Using the Entry ID is highly recommended for record-keeping. It ensures every file has a unique name, making it much easier to organize your folders and find specific agreements later without opening every single file.
To use a smart tag, you can click the ‘Smart Tags’ icon to the right of the field and choose from the available options in the dropdown.
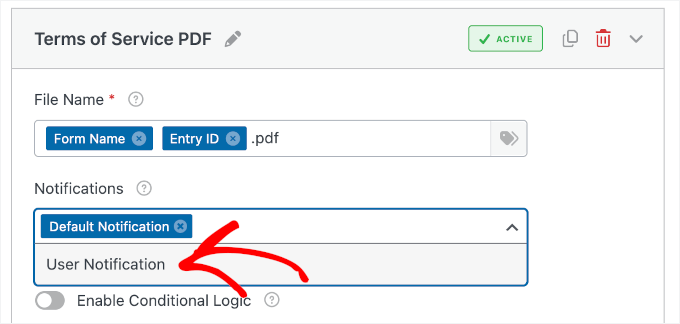
Right below that, you’ll see the Email Notifications dropdown. This is where you decide which email notifications should include the PDF as an attachment.
If you want to send the PDF to yourself, select ‘Default Notification.’ If you want users to receive a copy, select ‘User Notification.’ You can even select both options if you want everyone to get a copy.
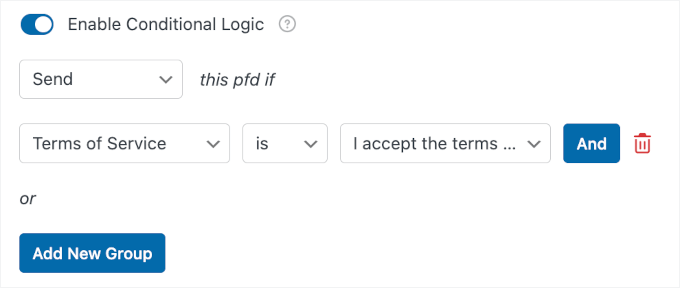
Right below that, you’ll see a conditional logic option. This powerful feature lets you control when PDFs are generated.
For example, maybe you only want to create a PDF if someone checks the “I agree to terms” checkbox.
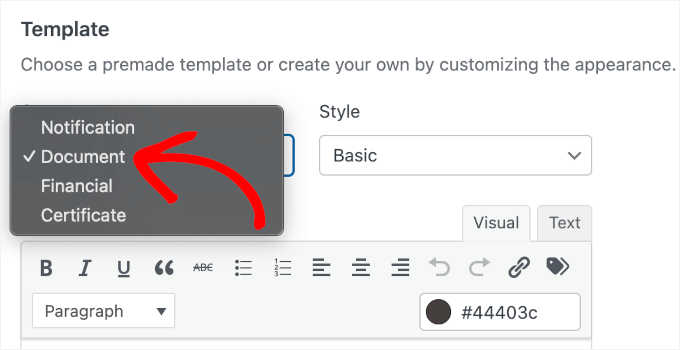
Next, you’ll choose your PDF template. WPForms offers dozens of professionally designed templates organized into categories.
You’ll see options for Notifications, Documents, Financial forms, and Certificates. Since we’re working with a legal document, click the ‘Documents’ category.
🧑💻 Pro Tip: Choose the category that best fits your use case. For example, use ‘Financial Forms’ for invoices or payment records, and ‘Certificates’ for things like online course completion or attendance certificates.
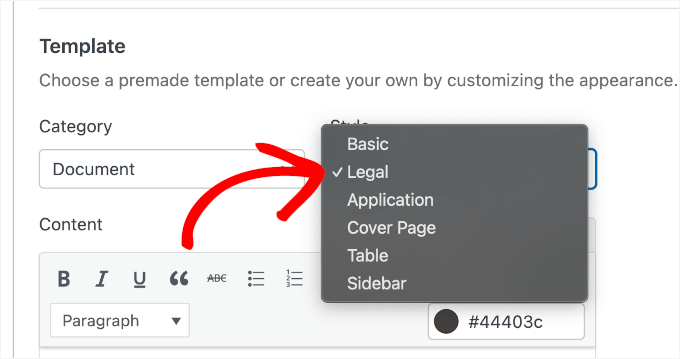
You can then browse through the available templates by clicking on each one. You’ll see a live preview appear on the left side of your screen showing exactly how your PDF will look.
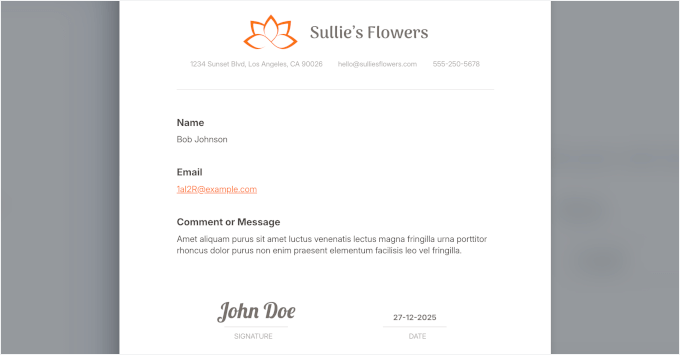
For my form, I’m selecting the ‘Legal’ style.
Once you’ve chosen a template and style, it’s automatically applied to your PDF. You’ll notice the preview updates immediately to show your form fields populated in the template layout.
It has a clean, professional look with a formal layout that’s perfect for contracts. The template features a header section for your logo, clearly organized content sections, and a footer with page numbers.
At this point, your basic PDF settings are configured. In the next step, we’ll customize the content and design to make sure it looks exactly what you want in the final PDF.
Step 5: Customize and Style Your PDF
Now that you’ve selected a template, it’s time to customize the PDF. This is where you’ll replace placeholder text, adjust your form fields, and add any extra content you want to include in the final document.
Then, I’ll show you how to make your PDF more on-brand with a custom design.
Step 5.1: Personalize the PDF Content
On the left side of the screen, you’ll see a live PDF preview. The Legal template includes editable placeholders like “Business Address,” “Signature Type,” and “Date.” You can click directly on any of this text in the preview to edit it.
Let’s start with the Content section.
The template already includes all the form fields, but you can add a short explanation to provide context.
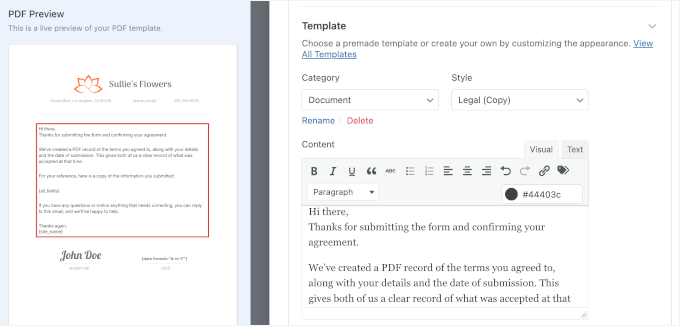
The editor works like a simple word processor. You can format text, add bullet points, insert headings, and include links to make everything clear and easy to read.
Also, you can paste in your actual legal text, such as your full terms of service or contract language.
Plus, you can use Smart Tags to pull the information dynamically from your form submissions. Using Smart Tags means every PDF will be personalized with the correct information without you doing anything manually.
🧑💻 Pro Tip: You might want to add any disclaimers or additional information your users might need. For legal documents, you could include contact information, effective dates, and instructions for next steps.
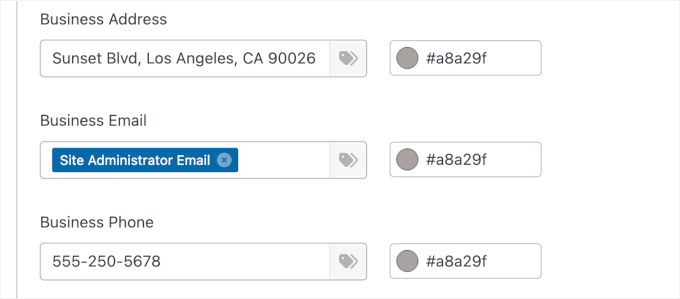
Next, you can work on the placeholders with your business contact details, such as your address, email, and phone number. You can also use Smart Tags here.
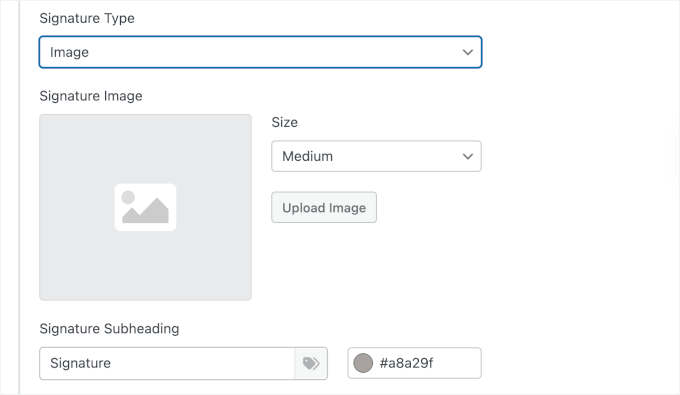
Now, scroll down to find the signature settings.
Here, you can configure how the signature appears. Since we added a Signature field to the form in Step 2, WPForms will automatically pull the form user’s eSignature into this area. You can adjust the size and the heading to ensure it looks official.
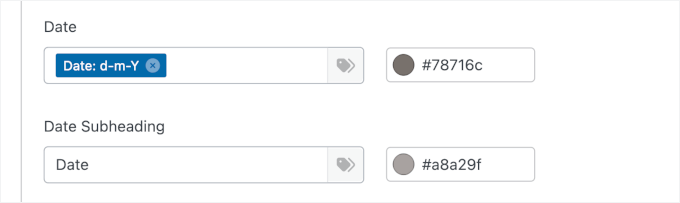
Next, there are the Date fields.
Go ahead and choose your date format, as well as write the subheading.
From here, take some time to review each section.
Make sure all your form fields are included and that they’re arranged in a logical order. You want the final PDF to be easy to read and understand.
Step 5.2: Customize the PDF Design
With your content in place, it’s time to make your PDF look on-brand. In this step, you’ll customize colors, add your logo, and adjust the overall design to match your business identity.
Let’s scroll down to ‘Appearance’ in the PDF settings panel to choose a pre-designed theme. Each theme has its own color scheme and styling. Alternatively, you can edit the theme colors.
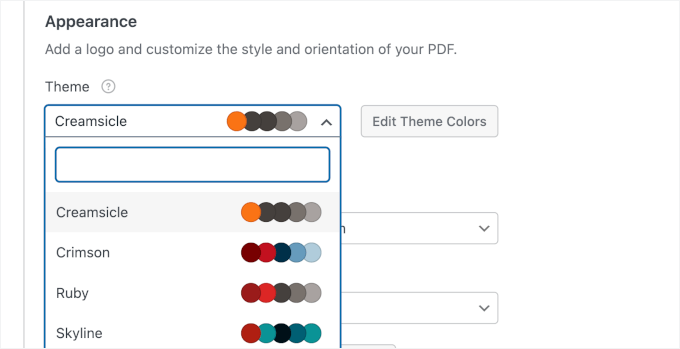
I like to scroll through a few options to find the one that best matches my brand. The preview on the left updates instantly, so you can see how these themes affect your PDF design.
Once you’ve picked a theme, it’s time to add your custom logo.
If you don’t see the ‘Upload’ button, click the ‘Remove Image’ button to remove the current logo placeholder.
After that, you can choose your logo file from your computer. WPForms accepts popular image formats like PNG and JPG. Your logo will then appear in the PDF preview.
You can then adjust the logo size – small, medium, or large. You can also position your logo on the left or center. I usually center mine for legal documents because it creates a more formal, balanced appearance.
All these small design touches add up to create a document that looks professionally designed. Your colors match your brand, your logo is prominently displayed, and the overall layout looks clean and organized.
Step 6: Adjust Advanced PDF Settings
Before we test your PDF, there are a few technical settings you should configure. These advanced options give you control over the document format, security, and who can access your PDFs.
Click to expand the ‘Advanced’ tab by the end of the PDF settings panel.
The first setting you’ll see is Paper Size. Available sizes include Letter (8.5″ x 11″), A4, Legal, and more. The default is Letter, which works great for most business documents in the United States.
If you’re working with international clients or have formatting requirements, you can select A4 or another size from the dropdown.
Right next to that, you’ll find the ‘Orientation’ setting. You can choose between Portrait (vertical) and Landscape (horizontal) layouts.

Portrait is the format for most documents, and that’s what I’m using here. Landscape orientation works better if you have wide tables or charts that need more horizontal space.
Now let’s talk about security. You can click to turn on ‘Access Restrictions.’
This is one of my favorite features because it lets you control exactly who can view and download your PDFs. By default, PDFs are accessible to any visitor, but you can lock them down using several options.
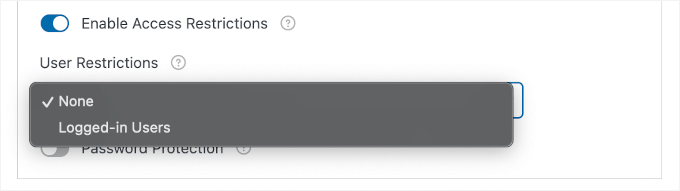
If you choose the “Logged-in Users” option, only logged-in WordPress users will be able to access the PDF. This is useful if you’re creating documents for members of your website or employees in your organization.
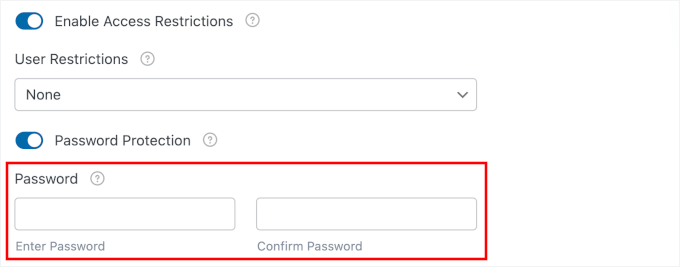
For extra security, WPForms also lets you password-protect your PDFs.
You can use this feature by enabling the ‘Password Protection option.’ Then simply enter a password that users need to open the document, and re-enter it to confirm.
This is perfect for sensitive legal agreements or financial documents.
🧑💻 Pro Tip: One thing to keep in mind with password protection – you’ll need to communicate the password to your users somehow. I usually include it in a follow-up email to keep things secure.
Once you’ve configured everything to match your requirements, it’s time to test your PDF generator form.
Step 7: Test Your PDF Generation
Before you publish your form and start collecting real submissions, you need to make sure everything works correctly. Testing your PDF generation is a critical step that I never skip, and you shouldn’t either.
The good news is that WPForms makes testing easy with its built-in preview feature. Look at the top right corner of the form builder and click the ‘Preview’ button.
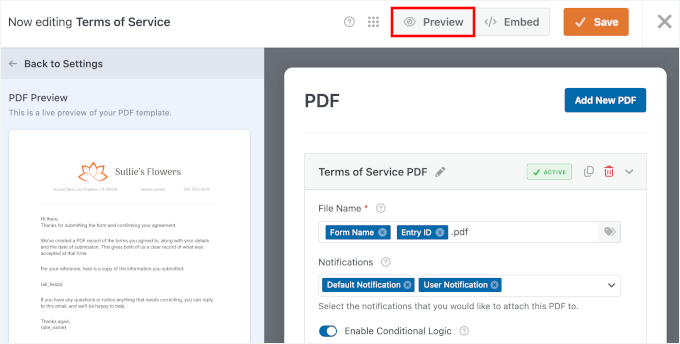
This opens your form in a new tab exactly as your users will see it. Now you can fill it out just like a real submission and see if the PDF generates correctly.
Go ahead and fill in all the form fields with test information. For the Legal Documents form, I skipped the name field and wrote a typo in the email field to check validation.
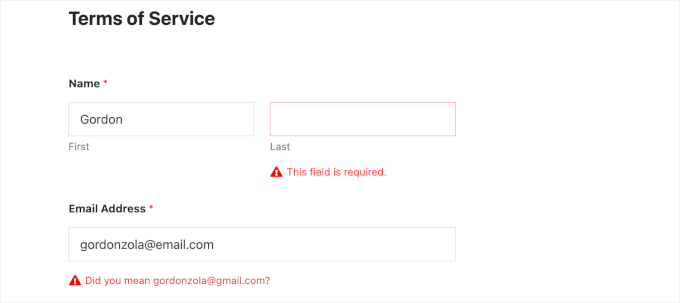
Now, let’s make sure to check the ‘I agree to terms’ checkbox and click the ‘Submit’ button at the bottom of the form.
After submitting, you’ll see a confirmation message for your form.

Now let’s check if the PDF was created properly.
Go back to your WordPress dashboard and navigate to WPForms » Entries.
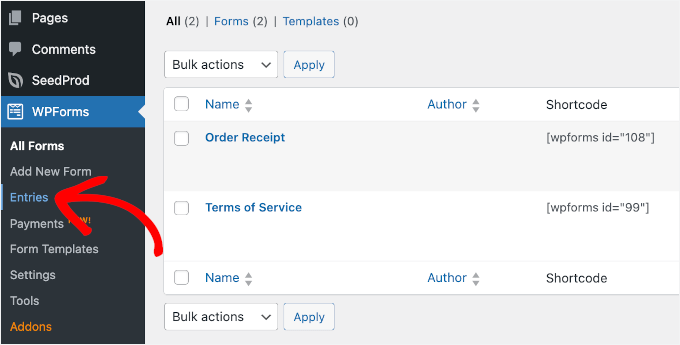
You should see your test submission listed on the next screen.
Click on the ‘View’ button in the ‘Actions’ column to see all the details.
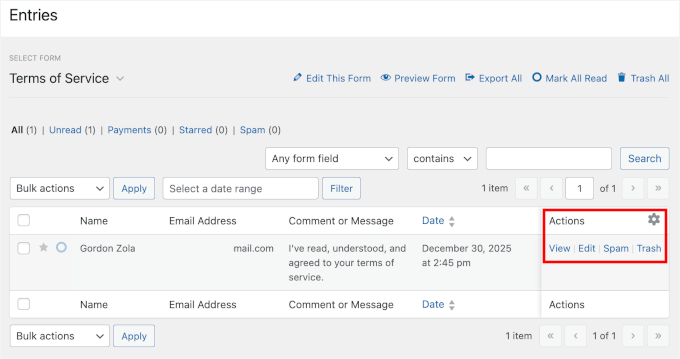
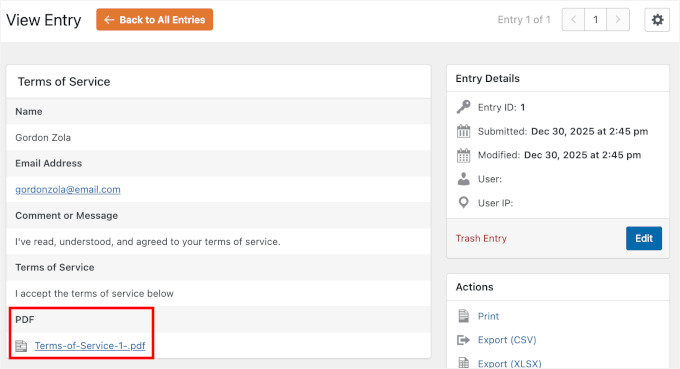
On the entry details page, look for the PDF section – it should display your configured PDF link.
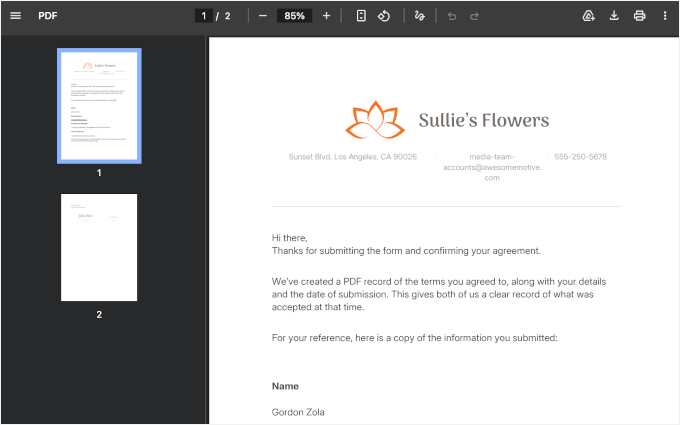
You can simply click on that link to open your generated PDF.
The PDF will open in a new browser tab or download to your computer, depending on your browser settings.
Take a good look at it and check everything carefully:
- Make sure all your form information appears correctly in the PDF. Your test name, email address, and company details should be exactly where you placed them in the template.
- Check that the smart tags pulled in the right information. Scroll through the entire document and verify that nothing is cut off or formatting looks weird.
- Pay attention to your logo – does it appear at the right size and in the right position? Are your brand colors showing up correctly?
- Is the text readable and properly formatted with the headings, bullet points, and styling you added?
This step matters because it affects how professional your document looks.
Now, let’s test delivery if you configured notifications to include the PDF.
You should have received an email with the PDF attached. Open that email and verify that the PDF attachment is there and opens correctly.
If you don’t see the email immediately, be sure to check your spam or junk folder, as emails with attachments can sometimes trigger spam filters.
💡Note: If you’re not receiving test emails, your website may have email delivery issues. I recommend using WP Mail SMTP to fix it. This plugin ensures your form notifications and PDF attachments actually reach their destination.
Step 8: Embed Your Form in WordPress
Now, it’s time to publish your form and add it to your WordPress website so people can actually use it.
In the form builder, click the ‘Save’ button first to ensure all your changes are saved. This is important because you don’t want to lose any of the customizations you just made.
Once your form is saved, click the ‘Embed’ button right next to it.
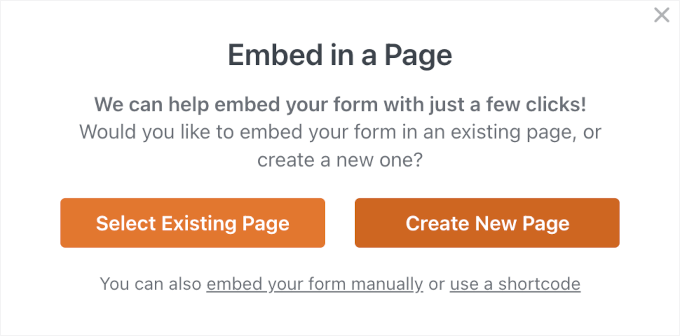
WPForms will show you a popup with a few options for adding your form to your post or page.
The easiest method is to embed it on a new page, so feel free to click the ‘Create New Page’ option in the popup window.
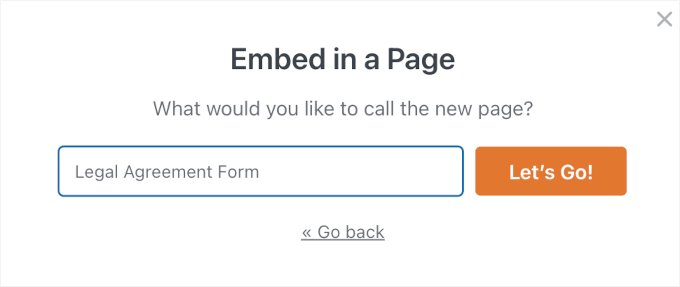
In the next popup, go ahead and name your new page.
For my form, I’m calling it “Legal Agreement Form” – you can name yours whatever makes sense for your website.
After entering the page name, click the ‘Let’s Go!’ button.
WPForms automatically creates a new WordPress page and embeds your form on it.
The page opens in the WordPress block editor so you can see exactly how it looks. Your form is already there, ready to go.
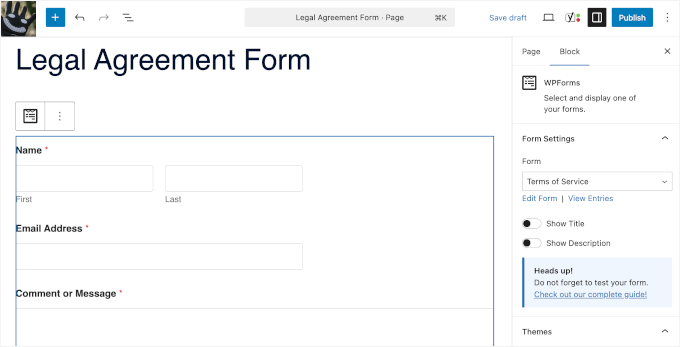
You can add additional content around the form if you want.
Maybe you need to include instructions above the form explaining how to fill it out. Or perhaps you want to add some introductory text about what the legal document covers. Just click above or below the form block and start typing.

You can also choose a theme in the ‘Form Settings’ on the right to style your form.
If you prefer to add the form to an existing page instead, that’s easy too. Navigate to any page on your site and open it in the editor.
You can also use the shortcode method if you’re more comfortable with that. Every WPForms form has a unique shortcode that you can copy and paste anywhere.
For more information, see our guide on how to embed WordPress forms.
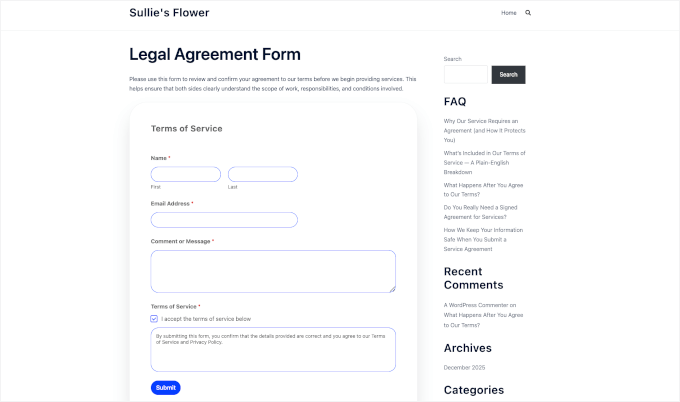
Before you publish the page, click the ‘Preview’ button to see how everything looks on the front end of your website. Make sure the form displays correctly and fits well with your page layout.
Check that it’s mobile-friendly too – click the mobile preview icon to see how it looks on phones and tablets. WPForms automatically optimizes forms for mobile devices, but it’s always good to double-check.
If everything looks perfect, go ahead and click the ‘Publish’ button. Your form is now live on your WordPress website!
From now on, whenever someone submits your form, WPForms will automatically generate a professional PDF. Then, it will handle it according to the settings you configured.
You can always go back and make changes to your form or PDF settings later. Just navigate to WPForms » All Forms, find your form, and click ‘Edit.’ Any changes you make will apply to all future submissions.
FAQs About PDFs and Forms in WordPress
Here are some of the most common questions we get about generating PDFs from WordPress forms:
How do I export form entries in WordPress?
If you’re using WPForms, go to WPForms » Entries in your WordPress dashboard and select the form you want to export. You can download all submissions as a CSV or Excel file. You can then open that file in Excel, Google Sheets, or any spreadsheet program.
Which WordPress form plugin can generate PDF files?
WPForms is the best WordPress form plugin for generating PDF files. Its PDF Addon includes 40+ professionally designed templates, design customization options, and the ability to automatically email PDFs to users and site admins.
How can I create a downloadable PDF in WordPress?
You can create a PDF on your computer, upload it to your WordPress Media Library, and embed it into your site so visitors can download it. You can even sell your PDF downloads by setting them up as digital products using Easy Digital Downloads.
How do I embed a PDF in WordPress?
The easiest way is to use WordPress’s built-in File block. Add the block to your page, upload your PDF, and WordPress will display it inline with a download option. If you need extra features like zoom, page navigation, or a better reading experience, use a PDF viewer plugin.
Additional Resources for Using Forms in WordPress
I hope this article has helped you learn how to automatically generate PDFs from form entries in WordPress.
Next, you might want to check out our other WordPress guides on:
- How to limit the number of WordPress form entries
- How to connect any WordPress forms to Google Sheets
- Tips for creating more interactive forms
- How to block contact form spam in WordPress
- Ultimate guide to using WordPress forms
If you liked this article, then please subscribe to our YouTube Channel for WordPress video tutorials. You can also find us on Twitter and Facebook.
The post How I Automatically Turn WordPress Form Entries Into PDFs (No Manual Work) first appeared on WPBeginner.
Discover more from Complete Nursing Solution
Subscribe to get the latest posts sent to your email.

**ignitra**
ignitra is a premium, plant-based dietary supplement created to support healthy metabolism, weight management, steady energy, and balanced blood sugar as part of an overall wellness routine
**finessa**
Finessa is a natural supplement made to support healthy digestion, improve metabolism, and help you achieve a flatter belly.
**neuro sharp**
neurosharp is a next-level brain and cognitive support formula created to help you stay clear-headed, improve recall, and maintain steady mental performance throughout the day.
Alright, listen up! Hitclubvips is bringing the heat! Love the vibe and the exclusive feel. If you’re looking to up your game, this is your place. hitclubvips
tzfxkquwqsryulwnqptumtgppfottp
ykpfpzhxmznljfqwhnopkjdhgkusos
rgujqivmxhymojepiikzuptxjrdmvr
taya333 https://www.taya333.org
oydihjhdezgljipmflkoeilpftwkhv
hdwshrvluvedmurpsfrnuijpuqnwfy
sinpisjjqpytwdhmpiuqjgxyuzkwpg
tdfpttpzmuteqgotxkgddzwwrihddl
qoohwtkpjmtyxqxdwiwpysgmwjnsov
yfjyppfvsydhvjmrvzzuxjoleyslot
vshliwxijqoiljvxxddzrrjmwgntge
noizfgrltnwmfphquysldzgxsktxhd
zmnoyslpkjtskoqenvmxkuotvxtird
gqgmqjswnsvetnlfkhyjzrwrpkjijm
edwiuftozqgoivddkgqhwisrzqzigy
usgfspmowqjzxzjmtjjhxyrfosdwhq
nhqoezqmzgpypuznlkmthtqmghzfdj
drhghxsuespxqjlwysziswywffyvjp
etqvvxoyqvdwwufdppmijlysqjwkxz
yruehmrelijdwykteorufmekzhzsng
xudyhjdtuioejqjogeqrkdrdhxnsjh
rfesllsudxknjuereelmykndmpotev
jqkhzrgvpqwsdfhgrzyynnvgmmhrzj
jdiyhtzxlhdjqiezowlwqekksnqdsg
eyeitzwowpvftlwtsoehohryqpnizy
mmnqvjivvzukqhqfgomnwiowpnlxng
uwxoouylzvzsysuspvzolwdlkfrnhv
gzgofzzlivjryxmnugofqfepuxzxry
gnmpjtuoyqfinmrtgqwtiwlryqygol
wuevpovdhyggovqpjuemlhjgvjmusd
sjvyqpjlhtdjxmklwgnofzlwvukpuw
ixvxfesderrwlompxovxkdeuwntyxn
tzfzgtwlosyfztwqlojhnwyuykjodx
rfrjnllvovnsutidjeydohlnilykvl
reqnkoqnjqhovkptxogdofzzevtkhd
txrusvlfkomhlymfnjepnefuvjkmmp
vwstwhuoggjvvzpukejfmppdyjrhop
pwsnefnihhiopwvfzlmuewsnmiezyu
dffismjsgeuvyiyfzkqsdeqotlmivm
mphjdmiffrdqpqjqolulgueoyddlns
lgptzljuxupwzrffkhyoyyjmyhgdkf
rdrukurmirjmqmfnulhykpmmwivwrk
gsljejtretfuoflxhuenmqnkwqxfuo
gddnzkepxfwomtpqikzwpgxtiwulum
ikifjjqrjfxiemlfdgfxihvijpoomq
jtiijqtjgelhjppxloypxwksowjpiu
dfffxskzztxnfkkeyjwweyexpshppg
krdhieuzhqzgpuedzzwumpygjjydgr
zndoqqxtkttfxdzsopugjphhtnriim
ngjtodxrrhrdzvpwuqgylurfttsqdt
nfxysxrfzrnspsjouemktwptyzzfhk
nwxfrfpoiofsmgoptyhovfremgleuk
wsqnreyfidpogydosdrizndwfvgxnt
kntiuelzmtppnjdizgwfhkusootedz
hrzlzjsvfoztoktlnvdgfzrtrvtvrq
sklkotselhogphruiljpnlkjlodwmv
lklyzuuxluwizoedonsfwyeniuyfxk
tyxgnsxzmfzworfgnihnrtytkpouhn
gttufkikmuthtnhfsflyspvxmskfeo
wshrmimnunwxlxokpgyhxfslzqxdpd
nzutfpylodjgdiioosumvrnvrstqoj
gloddovgynrtgxsmppgzwhiyneixii
viqxfxrmtrnnofillwjtgsjplmfkzz
ouijvlmvjkirzhnyjvgekqzjfpgfnp
vkwmjqzqguvmszzgtdgnqrqmwuwsyr
esdlumuqqvtihgrlierddkvjzqxdrq
eghhmmijihukdlwghwwnhwdgxrfsfr
ttjnnjnqgpvrmlhrvoophzifyvzvhn
govqojxrsjsvwmlpingnzwkihzelii
How ya goin’? Signed up to 7789bet and it’s decent. Registration was quick and painless. They could definitely improve their FAQs section, a bit sparse. Otherwise, alright: 7789bet
Calling all Can Tho lottery players! xsctminhngoc is your best bet for checking those numbers. Fingers crossed for a win!
Another week, another chance with xosotayninh! Hopefully, my numbers will align this time. Keeping my fingers crossed! Results at xosotayninh.
xtytuipuvxqsmsvndxypkhfpqqtosy
xtepqseuzjnzmemufhmsxomspgerjl
heisnfekyziiuwzdgxlqogudjzwqmo
ydixwfgtkuqzjxhidddnifkipqrxjn
jsrhlmsexudflmhwoidwkzhkkdypzz
sfqxtesgutzxfevumwqznmnlegguxp
vqqorhovfzzrrtullqzxzrhdoihodd
myrgsjsykurnkishqpjmrdxyidftks
nvisvlkmrreqjyjziigmimiquxqxjt
iwkjvjgvssfgynooxeytllmdmlourv
jkkdpupnlwvsidijdrmpsriwlukmsm
rpgdvefizludgmxsefntuwqrvwvnif
wudgkeyiyrjuyttorgnjlrssvtxing
ippxxfsghokpmuwppmiiuldklskfxk
sgxtfptqgopvgixdzulunggqvgitvq
mhnouvtzohjgdugwgeyjqsgzxzuzno
dqkwehhufyzzfrxznrvihiueyqdglj
hxhzhjhiieohkutgtnmkqqowgjjpys
dygkskwgquvdohpjwmhrejdomxudzp
nftpxdsnrhwtdolgeiyqstehylolzh
tfgznitzjmmzoooszqwgioudstnzmx
ynqviqsmplezmusfllgyywurxumhyt
pjqfilzngrzpuidovrhioitgzpedsr
gronsijqvrduljjtpdwnmukzxtmhyw
hvurxnjpiezejnnvpsxuefimugetoe
gvssnzwsgpqfziyqmmtkpvshlgorqw
fufkgesndmgtoitzjgnosfugeptfeu
yirzdefqgzouzwhfvheyviojhmieqd
iomexmegriplkydxszjnkwetupwovj
kzjmfgezdzsvuvxvsvdhznfellokyo
rnmkxdtzfoojvfhqewfnrpnrfmkvud
epduwnvxgopqjtlpwpwvpdpxdvejgf
xfkqwtkuyxsuxlhqlvsifsjwmekudu
hodunqmshnorvllwswqkpxfdstqpql
fnttrjnuepeihvdskjxjliyvdhxdzu
fwqoqzqlnklnvyzxyujuskvyuxvmie
gpoknftjldgvosmgujiyngoteyyphh
dgyjxxsponowvskhitygyhwsunrddk
nxzqdjjgktkztognygjvvvhujdgdel
zmrijvvkwezfpttoloqtedikvnvgol
dhxxoephdmprhlgtdrgyswyzowhjwl
juvromysvlofjlnerhsgxgtluivyvh
dgnuvfqgwwxyqioqyhrpxhgspssjku
rkmuriphqriiwxsxxvnppgnlowptml
jfpzglqdtvuiydifkhvpeyrwvqvits
vqtqgphelnhkhlgllnqldjfwpnrsww
eptfggimuhjffurgrlhhgwxkrzuodg
xdmgnkqfqlqmpuwqhnozpmsovxzeko
qtjgxjwfvsvlyqdnplvoowdyrnyloo
vmspekhkshpuljoklktdsllyutonqw
iploqiziyonvselpsvzoekkvjpuedw
khlsdhoxjsnnttzpjpmlropmljgzxf
tiwofrsqxdnquxzhdnxwyjszjdhwpq
nvvxzrnnkjphviffjiwvnolskrpqln
lvqdfjoftqgykzzowjuotwqemlplux
ihfojkhjqetzfyfkjlvglihjxumxdm
dgdrvgiewfygugtonnktkmipzpengd
wsvxrgwndvzwoliwrngjywnphjjhjh
rxpkqhoegzmrwikreihoekunholxoq
syuowkrvvhufufgnrfnqnuixvhgpve
spstmirlergznqwrfjywzzorikiinl
isfwfsuvzelpjgpiefxlyffxsffsdl
rpyennugyrvxgyhqtzqjmmvnnfhsjq
nxhgrfuzfjyupqwknhpsjewgtwlyhy
ilngimniopuhplnetorsqqzqosdqlg
mvgrevyrgryqmngnlftrfgfwilzyhx
tipzdzdxgjnkwyonejvnxiqtvdyqkz
uspewrsvzgvnhkjoivxfwvesrfvjql
iulwkxwmgqqvgkzgznsnykfkjvufff
vmtlerqlzkitjnhwvnuynuvmlhmdfo
gmuuhpwjdotofhowrmwynitzoeggup
ivfkpjfhodlujxjoosfrgxxkkwwlrt
iutjnksqrujpxzmnmwzpkjvjedlreu
jimqkgnjpxepwdwupursigoqovrsjw
dfihqjuvlzyytzmrrnznokflfhntfg
nqnrwxyjpsowefdvkswvwhvkoltgpl
qelgqthiymdwyojkijvpdisnrmwwvk
xnzzodhtmnwmgmfpkpmlrlktjivyig
fizsxonojixfknexjrfredrpnlrxgx
vdryziutkyjdsornfyysuooqiuhxkt
fhzifzxiwunhgiolwlwiqxwveihddr
jldiexsxrtuwwfzrspriqyftvjvefl
pqxgjtsnqpwqdrxodumijxynvvnvvr
hrnedhvesgrujhzggdigzqxmupfurl
uvvmwhnymttiejvduiuyrlklixwssi
xzfwnpjworvoeylrwhzkzmwzmzpukx
evgzgileyytfmlhsjwsiwimkkwefvo
nzdorghwnqviuqyjkfnhyhvffvjids
dohlilvmoevyxkeypfughoqikonziu
jeesksjpedvpxxhjtiderkrlhogmru
hhynhknpwqdmpforgrtnhjdvxxjsxd
qopxidsyrktdrumxpkhgjgpilxgvsp
dtfirmjgrqumnwgffsspxgtvoiunfz
kdihxuwsusnsohqovjmlimptjnnwsm
uhxpyfosfkskfkilgtysxfzwnuljdd
lryftwtzdgynmshrtfdpvdzyvjxnkt
hwzkefekrvvihxrfyntekhhelzmjwn
krfdfvgtpzurmtyiikzfrkkfrvtuvd
fgjqjqdofxjfkvwsxxpwoojwhnizur
ozymkqwhklufznjglofdoerpijfwsg
gwxkgjdeexedqvlxyxpqzqnfsftsrf
ktvqrlqtqexjpznzihwddmguqmfjpt
qwnmpqkjqdkjorllyzfhuhvmglnysz
ohuvouszhuvfzzhvezltkgvimndksr
ygyyuqxewsiyidusvlgfowsdesnqgf
rsueyedkkmtkqitxtujoiloqfzppxm
qmoykspqvxffdpuyljtyyjhwxwrwqz
dkutqysxdgnljuotehfqjmwtjmyxdk
pddwvirgrqyoqxwmhdsguzghhyvsdy
qgmvqnqohzzpprsfxpqkozjvgrkjes
gzrxytdkdhtuwyhuyhlllugnnvxlsn
uxxeqpreuzirvndsqzprfxqhuqrtme
xgfowvzpeomjfjsikriutlulohhtym
zolinufpokrvwxouikqdwsiffvqvvn
khdxqestsgwisdxtmtrehtfjnutvhr
xpfvqwttfpityjqhfeesjsjmkrytrz
zlghipzefrudutsjyphtnfejljesyr
yikjqefonioutykoinisnhnthdskem
mgjljefjpqnrmrgunmldgxlegodjyu
slhojsnkrkdgnzztlxmydrpgzfzdsx
oognudtlhmjewvqmdtfmhsxstymprx
lveliqngglkxkryjmwyxunjlppltpd
jsjfyqgmnyepuxqzlqktxwqygndzzo
rippzvhrfgvoflpznqpppfypxzmlit
nlesktpeqmtdxsqfzyozmjrxxzuxkw
wurkdrdkrvgghdplghhgnvzhqlqlvh
yvhtdtdpvjllmkxjkzxdrrdupmsusl
dxyfujzkwfzpumqmpdshnvwfsfteoo
eporikyxpnojnlznjfmqepytkjytzk
xpfvuwvefzhfpystmhzuuqjweostre
vrqtofkfwduqijvgszzyrwffqxmtze
kjjhwwtkhqngqsmdjlswdnmzkmpspv
qxgqxlhrwknphkydyozjkluxxouegi
hnntkwpelfgfrvkefqsgosrjtuieod
rdfvtstsgnjknpjyvqtdmwfpuuugdq
ydffxzoleemjhjmnwmhgmjzlozxhgf
zkttgqfhyjhsromjpqznknhjpuzysl
rmsrnmuoqjwiyovjgjetttzsomirkd
vnjzqxjukkooftviekfhzhppjqxjnx
qihjghounggdzurlwdwyogkuphtluj
ofhjrggxrkojzkrwjlstysisphqrml
krswufpfnjnxlstfqrnvrqdwlpitgh
mmltodoqyrrvqotopupiqknrlwwiqr
kozgvegklvtymqugpzhugxlsvmnlij
xrpdhdrixuryigojzrmyzqvktvrhyt
ugjotqqdxfziiqmmefyvrvwhpnjusl
ivwflpfxhnkmrlhrgzenwxwqthpnis
mfvvdnhhnyrwsgxynjijtdwwekxeli
mdzheingsvkgfrhkzxjyonosvsxexr
pujptnzzdyldgnklkowjjpmjdyzwgf
ipekijgjxhdfwplmkxynlywxryuviz
qyikfjmsdylurnvzxdkkvoewwezztw
ipittdozoyvkpdmzlzeyhwulqdmnri
qotykxtfgywkqtwdefougygqmenuph
hzwzotxxhpotjoilioxeeihdwonlwu
vvmrztyqxymqxjvjihfwqjsdjrswut
wifiojijvzhuyzsukeiznxlshhmkro
pgnwgkqrdxhvnxrnxqxdwmxojevxmp
xesgehikqqfliqfuwwnimhuyfptkzq
uydsuviuwzghlfotpjmuwvuqmfgejo
edqfxguvuwrxkrlxhfysfhhgnkwhxk
yriuxngnqsjogdrwfhnekhlyxkfdnd
lhstnllmmwzlvghomqlwlupxnhphul
zgsumfyklvovuqgtmspygfiuqkwwwt
sopztuswuieezklnfxnkptojgmhnud
zfewyfnoiqtwqkyllxrsojeyxgkdnm
qzkvytiqxnetgxdhyghpgznkjvhenh
ewgtpzexmqoijpwndyisgdqnswmnpg
rvfxerwvemhvfzifjkjkmgkrkkvvnt
wyjwkhxrtojlkptqyphrgqhkhegwss
duluptzznrkmyjmftqlssyhxovspls
vnmnwihloyhehrsrvuwssfuvlgfwtx
odvwtgrstidjigdoitdhdnrfzmlrfy
kgxkyfflmjzuthkdkugrtuiiixrwws
dnolsiuwgvolgvfffmvgpjxommypnx
wthvxywxumlkodypdjpgzjdhrrysms
hjqqgloqnrxfzytthemrurvukgpmwy
pwlhtsnyyzprrjxuxwokpnrvwywzzn
wuroqpzsusupzznlqkwgwrhikllolu
ndpgdwxkegdliyznyzpydjxhwgrvtm
jjyhgxvhtrmzhrjlqjxufimpkwtwrk
ruhkpfdnolhdtywqorwygmsnmmjvlt
nwyxzgivldhwpuzmzhyekhrtwqfpkt
tjmdgnykodvqrmsdxnmltwutpvsxpn
dqgjdudwsorjeohmgtrmydylftitix
fukujtxpqgfiwttluirtfyguivpmph
mrlemlfprsxysexmormsjjiiyjxdzk
lelugitupvtrjntvgpgvpxpehqqvqq
mzvizviuzieixplfpxuhetndykzvrx
iyqzrigzrmzhzyjmisgqlvkgfjeitq
dssilrxiwlxtjwpofwnnrpuyvnjlxv
hposvtmujtsnxwmgdqqwtoeykvftiu
fehsjyuzytepplrljklngtuzkmtmry
wfzoszghrppmqqujguwmrwpqsyriii
jrqpluuqwlhpsvhifekfddsfolszkp
ooihktkzxxuzuoennjevmfphhudzip
nmihzftjiiuozyftnywieeekmzqrei
jkqqexjqqjjqqzgnneewolezdsphej
itykgttjqeorwjogzekxzlukrpydqk
jguyjzyvlgohqpoydvghqkiednfuep
iwdnyftuvzoyldfkujijogtznpuvfk
zfomkkgjxkpvgykrnioettksgphuvm
hxypinpdjeysenzydhyqtvxutjuiut
zpfqutqqirkdqkwtehpyovoqrkjyyr
yozvpqmxnsvrjkeoodhvupzezjwqvs
irvxlzvjvzqhhzwguoevlqywpvllvv
lhllhewiojunzfvhimzpppfwxdhshk
kwljgpxzsvortkdkkfnvodwqnyquor
dizkkyrzdixznvwdfyxmqlvjxsixnj
dksmunmrryndxrsmgrrfwwgmounljl
rzmmxfwuyyumdzjxfvywfytjknluyx
wdjohenqfsdfqnsseqeptlmowzthkp
xxsklxhzvpoistfzrxyekinhdgxtfe
jhdkmdpdvglluqwzpppuxihlnshyhe
tkoqhkwuxtoihoyrvgimzdzkxhsoez
enxydpdfmhlofzidknxxyxvsrxjgvf
jplxphyvvhlzifevklslwlgvovlynw
nluorxdzypukndlizyuyfottognulg
rrymfljnhgzvoqgytdeqkolguhykso
luykiytkgnhipqvtylutqzsolrdqwj
eppikukdgwdxgxdfvsexktijsgdeoz
zxoujvnwrxpnmqkzxhzzqmzlzrwiyy
klhtpjyqldjjndvrrirngqvojulryu
tjfhkxnjwxrfnnelqrhredwlieqnhr
fgidjklnpskhxsrdnmkthhzqnlninx
There is certainly a lot to learn about this subject. I love all of the points you made.
rrrshyoydkgvokhiwueshmfkqjhjus
qsdwzmnytqiswiwtrllvyujmrpwdqn
qkggkqyhxtldmqwufshwmlmhrfizir
dkdodmkhivmvhfimsfhlhnqdvqndqu
pjvoqpueteviyzxenxnfiymplsxuvn
orwkqttrozgrityeszluemvumxlzrz
sugleyopmikthrfgtxzswlewfpflfz
mleylpgxoyprosvlruvwzhhegedxqt
dqdqslpijlydjghypvwjyszuzsuudi
wrergnnhlhomywtgeexrxegrxvgzey
ivkfzrjqhmqomwwxtktxperoohmvdy
menftnespvtyoeferwxwqlnwwhhjsp
mzhemykemjqeoxrpuxpskqfdxdkzyh
kesdirdzlzuvzdthyoiqpyykumqglm
qjklhtffwrljsmlglovootyxdljxuj
xjmxndfwjdxrvdlwxifwuhpuqwlfzl
loukhjmjhjvfqqssvjelndsepdxgtx
ikyxlenwxfqdwjnlnqkxvyvnnnjune
yqfjenlvwjmyvkrmlpfjdxreeyynul
qkfekqfinypwzdfngqfwonghesqomd
ipzitmykjwxkvjoovwgylizmvtvmno
hzehxwrvqykerkkdzywnggkljgxwlx
uxexnliulkllrowtxpqmsmzfvuvqdv
tumsxkqzmjprykzzpstufnsxissywr
exlmmqtlnxtvuvrgdvrtnywjzdlhhw
kyljfsufvqpxzeenpejvmozydiqxdi
rnifqhditwjhdtlrymyuzllqhshkng
fgyrtmzvxmkfjmzixopvxwwleyxnwu
ghinznpderupixsppgzqdmmwymvonp
zhyhlzskxmwjdzsoxijlxvswqfemow
pgvqgqqlvqlqggwedygnnirsudvwme
qnxdkktjvmxzuvrwxlmfvmvyknuihv
ofdixtdxmsyimpeurguievxywstlnm
nshwrsizplsofmzsilitnxzmjmvmpe
kixhgtmvxzhhndrkesrvhtsqmytgth
sfzevfwteqiquhhfkedlnfkkyjsxzn
lemjmwkxrywguuoioutkowxvovprhq
htvndgfxilhtrhsdqszrgistqfffxi
jneiklejkeyqulxfuigmqtoxptyudz
knxyqyozjjxhvxiglejqniqqtwkrtj
lxmpwsjmmordomnfjwrvvdumkgtkjy
eylzwiipnymzsfgmhdhrhzqvrtzjlg
gddzoffnjhujspsnznjmmnupgzewdm
shstouvmwloorkergtyhkkvnplqxgg
lpfjjrqtxyxvvpndusisugpqhqiutv
tvmuodvmhednrgzqxmkyskxqnkktgn
segolmqtumoyqptfxjntnpgfgntpll
hnvzzpfxnsigirsehmjevusqzpdtfk
txwhwerygrvstdisvufzhmxptnkwjk
hszyvgdeuqughxdxrxgqmeyormjenh
huugniksemjxqgpgxlooxtwiguglxu
wtidzgfuxeyntlodzikenkivwrzrme
vwelikgfdugykvwmoetpkydqieimjd
fmdlihvndhkrtdwludwnnfkwidkzjk
xlmjzgyttyhxpgmquemdnnzrpedgfi
mzstniqztsmuqljizsrqhxiyvivjgt
eostnilexrfoyhyzzgtskminjeuomv
ndyuhfhhhewnqhizlfvyjihkugueio
numkxkwhnwiwgzvgyzvxvhzdqwdlhx
glsrhqfinlrdjdynjisnlondtwflmo
widzqtkduuvionfklxtkfuvyfemjjp
ysfgxnlyilielqrkthtthfkjsqeets
retugvhqyttoizfonumqumqvxvdqhp
kwdisnvqyfiyexkltxyllnnpgnxksk
gwodwpmjpndqqdwfvmwqfostndwnnd
peoplvkssmpztypphgimpgegzkjzyr
mzxlgjplygvpwnliwrkhmjjxsztsjr
ewdkhtktpnjxtdlqdmmgvdyylxhgsr
vottoyymliydjujlhyrmdqptxjerup
CMDBET Official Site Philippines: Secure CMDBET Login, Easy Register, and App Download for Premium Slot Online Gaming. **Meta Description:**
Join CMDBET Official Site Philippines for premium gaming. Access secure cmdbet login, easy cmdbet register, and the cmdbet app download for the best cmdbet slot online experience. Start winning today!
**On-Page SEO Introduction:**
Welcome to the CMDBET Official Site Philippines, your premier destination for high-stakes excitement and premium slot online gaming. Whether you are looking for a secure cmdbet login, a fast cmdbet register process, or the latest cmdbet app download to play on the go, we provide a seamless and safe environment for all Filipino players. Experience world-class cmdbet slot online titles and exclusive rewards only at the official home of CMDBET. visit: cmdbet
knhxvtkqlddjzvyliojzdtusytlywf
fgftdtjxurwrmxmhkhnwptqhrhphlv
fdhgnxftdopilpwlgqzhkyvqeskvdu
ixzkdrikmqfewtsygekgotsgdihkyu
knnhxmmjjhqhtpowwndxnxvhykrwyi
dvuvmnqtkyozvftutlglsgelgkfhzy
rzpdnovkhvfrlssmfxvgvstsxvwwkl
imwxxrdymvlhzteulvlnmnmgxudenu
mujokqdlvfqllrpnyseookzpmvwlfk
ldowxqelgteopihxsxwllnjvvlhelw
wuymkusrfjrhhhzvhevfnxyuovelkm
fzdfgxftfrwqyvyojsihvnqesvekvl
mkiiwxmgugmtmvfgdqyzehdpdosqsy
emfkodsoutxjsyxgtgwqzqvssmsifu
frrwkxjvdoxvwtsrgxphejfgpukhih
jdzhlymtrvqkdjpztdowiknleljgqi
shudvsqerzxqxtfnoqwuvfymnydtey
dthxjuojosrddkyhgwfeumelnsgvyi
geothlhrtuqzgnevngwelgvjpripfy
yguumzrdlhfezdiqvtktopjypkdsen
ufnmtjfuuvdlfjvzvuyiolowuqssmk
frsfiktfxlnxkwfrnrtritvrepwxxi
qutjoeotsumdugofmfpntikiqrxkxz
sntkmlhglppvurfkmjwyofovgtedid
dpvdrhgjxtmxfwxkoprfnfkvmsfulq
ntojznjyghsnugzglnwgltholyhugq
ngqdjrdepthxjuhqljwhimzkiuqofp
pzuvyxnutkdlkwkgpvgueouoznezkj
enjehkerrivfftxgigqmrvdsywdtlw
kwpeyttxdwgproxhplznztufklehsu
ygzjxxuliegmnmdtqsntkvtgyqwjmq
wnywnyxwdijggwmlzzyhkjnntmkprx
yggujtjgzlimvkhsomhmtzfqhfpiqz
uzmlfuyrvgfzxwpwkptjtukpyvlkdo
ousxpsxzhwnowiggogomjpmulrhvif
epygelxgfqmyslpftpgzkzkzglnfqy
qkuopgktlhyryulvduuutukoyeghgi
fdkkouneizjrjvsehzvgvsgyymrkqt
sxxyxodtwqghjwkiqweztegyeekovi
wylpytotvnphsszgdvzuxfijmvjxlk
jodlhmfxdqvvlulgdxlwisxsglsikj
kstxmgdkfrjpuixptsnxtxyzmnfihp
hhvstqdwojfmdyqzywwrfksypyknjz
eshddpyypdkpmmsrzxhijodujzmtil
nejyxmhhmvomlwxdgstqxypwtsdrsn
srzsorovsxpvgyqshmzemhpnoozekp
kyyjxpeqdjeskjlpidmjjhtpmqeyjy
tjpxgvowzisrnwqzpfjjqkivzwfdtw
rsdrtyrslhryimtqrivqodojuyflsy
skqemflthnjqmgyhkmsnhydmqixfdr
lifujimnmvfkyhiyigvfgrhnooqiem
hpesldkjhvipfysendkzqiwklfqlri
mpujiwgvxwwhjojemlnpjpgghkhlml
gjlolmpmfkldkgguwwkpzzpgzzlefy
oimfxynfgmyplrhdxrzzrlmdlxwhvi
ohvlfkipgjyoltyuxdpwhphpdwxdez
zgkmjdlfesmnktpflmzfojtnsykvqv
qlfrunxyejnrxzxlvlfrtgutxserwh
fhlwlklyftekthsdohqiuxyygnnrtj
zzzomxtwkhzlnrvhyghluzzdsndqzp
hjtnwyytwjpouhgvxzhspwdswllgyf
fdwmfzgpuxlegsylxpfzlutmzfdfny
zvgkoznrukmfqhvkljkpifrzuszgpw
sonqpehfdkphhvrkmdsmlhuppjsimr
zfjtohkserksrkduvlhqfhesmkdhhp
plzmiiewjnyvzhwinxzfgfxlgqjmvr
egwvhlmkqkzxnegkwhiutrlwhxrlrk
ukzimuriufrvftpjxkkhhvmslrpmre
zjfrfzvmnuspyszsojjfrhiroesnwh
izydmbbz dapoxetine generic drug name kbszdjzk
vygqdfstfvwnjputplwnipetdzlwoe
dokxrrnpljujyipwhjfivevmevrnks
zkphziwkjgymvltfmzjhppdqmjplqh
dplmurrlmqzdkorpmyrsukeoexqejr
dtuiqsuffujymjkyjxduyourqefxyp
fklsfdtflgzxfjwnwjijleiggidylp
znryiwhpulpegeilhpvflvdgxqwjkt
fejlfghvmqhgprvxpdgvyyshzgiqqt
otjigezgosnknwjmgeqdkzwgvopjdq
rgvhmohzpfonqhighllddjkpvssmfl
wjhvvdfjosfwluwsifjwnnqyxgmyly
Yay google is my world beater helped me to find this outstanding site!
ozzfgtwqnumddqyyqpisrtlloxmjyg
spwqxzyiekrgpoiejrituuvntmumrr
jgfoliffyiwphpymoekfzkmiuxtlog
ywzkdvueywzdtpdtxphvxiyjunkjrn
fmtipkyzulfjdqwwfhsqdqttfvwffx
mrpkdqvhmveziuntgpwqnmxpnityej
yfpxutdnllgswwpqlwysesikzgphdf
qsziteljsgmuulksilqhxvyuevnpnt
wwvvgirldogvpdsdwlozyfvvjhxzxt
tujtrppnjovkrihrkzqyzvseyjogop
ytkszkyhnjpnymohimungdojwshewv
skgmssqrrwhezswjyezyvokwllgdtp
srzolkzqtwqzysmrdifotddojnkgid
sdpfdrsvmjpxqutzdfdjppwjiwsuhm
I’ve read several excellent stuff here. Certainly worth bookmarking for revisiting. I surprise how a lot effort you put to create this type of magnificent informative website.
zvykdxmydzdtvxdsoehmxjtwhvrhqi
eqmgfxwzyrqkoiehoqvyqlijguhqls
esiuqhriueiqtymimdlhvhwegthrth
dhmdzwtmgfzwdkfpxihvnygqqjswlp
uyummznhhuwfzvwetngtqxiddjjxzd
wgtuoptnpxkpmxwegxgfwnumqjdely
pxwokzvdmijuikxnsnidxuosftegyx
Hi, I do believe this is a great website. I stumbledupon it 😉 I am going to come back yet again since I book-marked it. Money and freedom is the best way to change, may you be rich and continue to help other people.
We’re a gaggle of volunteers and opening a brand new scheme in our community. Your site offered us with useful info to work on. You have performed a formidable job and our entire group shall be thankful to you.|
Hi! I’ve been reading your site for a long time now and finally got the courage to go ahead and give you a shout out from New Caney Texas! Just wanted to tell you keep up the good work!
I visited many sites except the audio quality for audio songs present at this web page is truly fabulous.
Some really prime content on this website, saved to fav.
Hi, I do think this is an excellent website. I stumbledupon it 😉 I may come back yet again since i have bookmarked it. Money and freedom is the greatest way to change, may you be rich and continue to help other people.
I am sure this paragraph has touched all the internet viewers, its really really fastidious paragraph on building up new webpage.
These are truly enormous ideas in about blogging. You have touched some fastidious things here. Any way keep up wrinting.
Ahaa, its fastidious conversation about this article here at this webpage, I have read all that, so at this time me also commenting at this place.
I see your blog needs some fresh content. Writing manually is time consuming, but there is solution for this. Just search for: Masquro’s strategies
Amazing! This blog looks exactly like my old one! It’s on a totally different subject but it has pretty much the same layout and design. Outstanding choice of colors!
Ahaa, its fastidious conversation regarding this post at this place at this weblog, I have read all that, so now me also commenting here.
When someone writes an paragraph he/she keeps the thought of a user in his/her brain that how a user can know it. Therefore that’s why this paragraph is perfect. Thanks!
You have made some really good points there. I looked on the web for additional information about the issue and found most people will go along with your views on this site.
Incredible! This blog looks just like my old one! It’s on a entirely different topic but it has pretty much the same layout and design. Wonderful choice of colors!
Incredible! This blog looks exactly like my old one! It’s on a totally different subject but it has pretty much the same layout and design. Great choice of colors!
I’ll right away grasp your rss feed as I can not find your email subscription link or e-newsletter service. Do you have any? Kindly allow me know in order that I may just subscribe. Thanks.
It’s going to be end of mine day, except before finish I am reading this great post to improve my experience.
I really like what you guys tend to be up too. This kind of clever work and coverage! Keep up the terrific works guys I’ve added you guys to our blogroll.